A screen repair should be invisible. You should walk out of the workshop with a phone that looks, feels, and behaves exactly like it did the day you bought it. The problem is that not every repair gets there, and some of the ways a bad repair reveals itself do not show up until days or weeks later.
This is the checklist we recommend running through in the first 24 hours after any iPhone screen repair, whether it was done by us, by another shop, or through Apple direct. It takes about ten minutes to complete, catches almost every common repair fault, and gives you clear evidence to bring back to the workshop if something is not right.
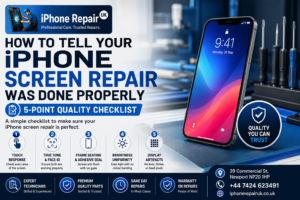
The 5-Point iPhone Screen Repair Checklist
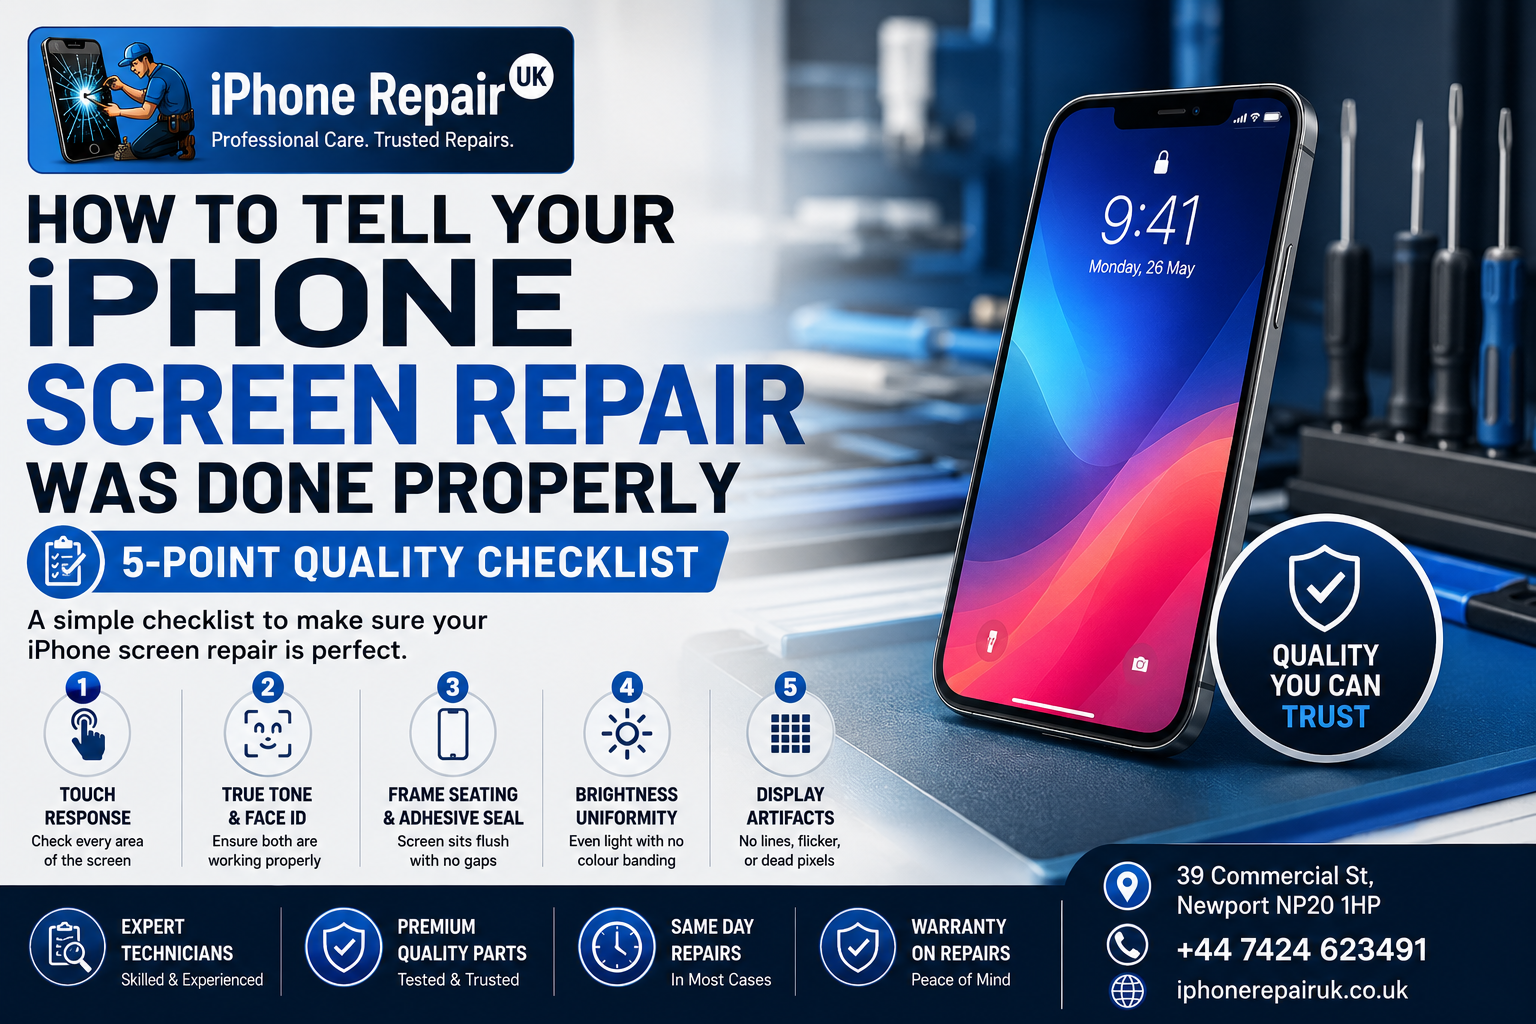
Every one of the tests below matters. If any of them fails, the repair is incomplete and should be reworked. The five points to check are touch response across every zone of the display including all four edges and the corners, True Tone and Face ID both present in Settings and working correctly, frame seating and adhesive seal with the display sitting flush all the way around with no gaps or visible lift, brightness uniformity with even backlight across the panel and no colour banding, and display artifacts absent including ghost touches, flickering, dead pixels, and lines.
Run through the checklist in a well-lit room, ideally next to a window with plenty of natural light. Some of these tests are hard to do accurately under harsh overhead lighting only.
Check 1: Touch Response Across Every Zone
Touch failures are the most common way a bad screen repair reveals itself, and they can be surprisingly local. A panel may work perfectly across 90% of its area and fail in a single corner. The only way to find these zones is to actively probe them.
The Zone Test
Open the Notes app and tap the New Note button. Drag your finger slowly in a snake pattern from the top left corner to the top right, then down one row, then back to the left, and so on until you have covered every part of the display. The touch response should follow your finger continuously with no gaps. Pay particular attention to the four corners of the screen which are the most common failure zones, the top edge near the notch or Dynamic Island where digitizer flex cables run close to other components, the bottom edge near the home indicator where touch has to remain responsive for gesture navigation, and the area around the front camera cutout where the panel geometry is most complex.
The Multi-Touch Test
Open the calculator or a game with multi-touch controls. Rest two, then three, then four fingers on the display simultaneously and drag them around. All touches should register cleanly. A digitizer with issues will drop one of the touches or register phantom points between them.
The Edge Grip Test
Open Safari and scroll a webpage while holding the phone naturally. Your palm and thumb base will contact the edges of the display. iOS should reject these as accidental touches through palm rejection, while accepting your deliberate thumb interactions. If Safari scrolls unexpectedly or opens the wrong link when your palm brushes the screen, palm rejection is not working correctly.
Failing this check is a strong signal that the digitizer or its flex cable is faulty, damaged during installation, or improperly seated.
Check 2: True Tone and Face ID Both Functional
True Tone and Face ID both rely on components that either sit within the display assembly or connect through it. A repair that damages either is an incomplete repair.
True Tone
Open Settings, Display and Brightness. The True Tone toggle should be present and visible. Tap it on if it is off. Move your phone under different light sources — a warm bedside lamp, a cool office light, natural daylight from a window — and watch the on-screen colour temperature adjust smoothly. If the toggle is missing entirely or greyed out, the technician did not transfer the calibration data during the repair. This is a fixable issue but requires you to return to the workshop.
Face ID
Open Settings, Face ID and Passcode. Enter your passcode. Set up Face ID from scratch using the Reset Face ID button and Set Up Face ID. Complete the scanning process. Lock the phone. Wake it and check that Face ID unlocks it reliably. Try under normal room lighting, in a dim room, and outdoors if possible.
Common Face ID failures after a screen repair include the scanning setup failing to complete which usually means a flex cable is damaged or a component is not seated, Face ID working only sometimes which suggests an intermittent connection, and a Face ID Not Available message appearing which means the module has been disabled by iOS.
Face ID cannot be repaired outside Apple’s own service infrastructure once the module is damaged. This is why a professional screen repair takes extra care during the transfer of the Face ID components from the old display to the new one, and why this check ranks so highly on our list of what a good repair should include.
Check 3: Frame Seating and Adhesive Seal Integrity
Modern iPhones are engineered to specific tolerances. The display should sit perfectly flush with the aluminium or stainless steel frame all the way around. Any lift, gap, or misalignment is a fitment issue, not just cosmetic.
The Visual Sweep
Hold the phone under a bright light and look at the seam between the display and the frame. Rotate slowly. The gap should be uniform and hair-thin. Watch for visible lift where the display sits above the frame line, uneven gaps where the display is closer to the frame on one side than the other, a step transition between glass and frame that you can feel with a fingernail, and glue residue visible around the edges of the display.
The Card Test
Slide the corner of a business card or credit card gently along the seam. It should slide smoothly with no snag. If the card catches, the display is not properly seated.
The Water Resistance Implication
The display seal contributes materially to your iPhone’s IP rating. On iPhone 7 and later, the display gasket forms part of the phone’s protection against water ingress. A repair that reuses old adhesive or fits the display without a proper gasket compromises this rating. You will not necessarily see this on day one, but the first time the phone gets caught in rain or splashed, water can enter the chassis and cause damage that a properly sealed repair would have prevented.
If you spot fitment issues, do not ignore them. This is a repair the shop should fix at no charge, and it is far easier to address on day one than after the adhesive has fully cured.
Check 4: Brightness Uniformity and Colour Consistency
Panel-quality issues often show up as brightness or colour differences across the display. These are easiest to spot on solid-colour backgrounds under controlled lighting.
The White Screen Test
Open Notes and create a new blank note. The screen fills with white. Look at the entire display and check for darker patches especially along one edge or in the corners, warmer or cooler areas where the white is not consistent across the panel, a visible tint such as green, pink, or yellow that varies from centre to edge, and banding where you can see distinct horizontal or vertical stripes of slightly different brightness.
The Dark Screen Test
Open a note and change to dark mode, or use a black wallpaper on the lock screen. In a dim room, look at the black background. Check for backlight bleed visible as brighter patches around the edges which is an LCD-specific issue, grey blacks rather than true black which is also LCD-specific, and uneven black levels on OLED visible as slightly darker or lighter regions.
The Colour Gradient Test
Open a photo with a smooth colour gradient such as a sunset or a plain sky. Look for visible steps or banding in the gradient. A good panel produces smooth transitions; a poor panel produces visible discrete steps.
If the screen fails this test, you are likely dealing with a lower-tier aftermarket panel. Whether this is acceptable depends on what you agreed with the shop. If you paid for a genuine or premium repair and are seeing significant uniformity issues, the panel does not match the invoice.
Check 5: Display Artifacts and Ghost Touches
The subtlest failures show up as intermittent artifacts that only appear under specific conditions. These are the hardest to catch in the shop and the easiest to miss for the first few hours.
Watch for These Visual Artifacts
The artifacts to watch for include flickering during brightness changes especially at low brightness or when auto-brightness adjusts, dead pixels appearing as always-black or always-lit dots on the display, stuck pixels appearing as a single colour usually red, green, or blue that never changes, vertical or horizontal lines across the display either constant or appearing intermittently, green tint on iPhone OLED panels particularly visible at low brightness on dark backgrounds, and pink or purple discolouration in patches which often indicates panel damage.
Watch for Ghost Touch
Leave the phone flat on a table with no case, screen up, and just watch it for two or three minutes without touching it. The screen should not respond to anything. If the phone unlocks itself, opens apps, or shows touch registrations, the digitizer is registering phantom inputs. This is called ghost touch and is one of the most disruptive faults an iPhone can develop.
Ghost touch can be caused by an improperly seated digitizer flex cable which is common right after a rushed repair, pressure on the panel from a case that is too tight, a faulty panel where the digitizer itself is defective, or electrical interference near a charger particularly cheap third-party chargers with poor filtering.
If ghost touch appears immediately after a screen repair, it is almost always the repair. Return the phone.
The Temperature Test
Ghost touch and touch failures sometimes appear only at temperature extremes. Take the phone briefly into a cold environment such as outside on a winter morning and test the touch response again. Then let it return to room temperature and test once more. A repair that works at 22 degrees indoors but fails at 5 degrees outside is not a repair you can rely on.
What to Do If Any Check Fails
If any single point on the checklist fails, the repair is incomplete. The correct action is to return to the workshop with a clear, calm explanation of what you observed. A professional shop will re-inspect the phone and confirm the issue in front of you, diagnose the specific fault whether it is a flex cable, a seating issue, a faulty panel, or a component that was not transferred correctly, rework the repair at no additional charge within their warranty period, and explain what happened so you understand whether it was a defective part, a fitment error, or something related to the phone rather than the repair.
A shop that becomes defensive, blames the phone, or asks for additional payment for a rework of a recent repair is telling you what to expect from future service. Most reputable shops in Newport will make this right without argument, and the exercise of returning with a specific failed test is much simpler than trying to describe a vague issue.
If your original shop refuses to rework a clearly faulty repair, or if you are stuck between two shops arguing over responsibility, an independent Apple specialist can inspect the work and give you a written report on what needs correcting. We do these second-opinion inspections regularly at our Newport workshop.
The Follow-Up Test: Signs Problems Will Appear Later
Some repair issues develop over days or weeks rather than showing up on day one. The following week or two, watch for True Tone stopping work despite being present on day one which can indicate the calibration data was written but is not persisting, the display starting to lift at one corner which means adhesive was insufficient or old adhesive was reused, ghost touches becoming intermittent particularly in cold weather or under charging, the panel developing a tint or banding that was not there initially which indicates a panel defect or improper installation stress, battery life dropping sharply after the repair which suggests the battery flex cable may have been stressed during installation, Face ID slowly stopping working reliably and developing intermittent failures over a few weeks, and water resistance being compromised which is revealed only when the phone is exposed to rain, sweat, or splash and stops working.
If any of these develop within the shop’s warranty period, treat them as a warranty claim. Reputable repair warranties are typically twelve months on the panel and workmanship.
When a Poor Repair Requires Full Replacement, Not Just Fix-Up
Some repair faults are not fixable by rework and require a fresh panel. These include damaged Face ID modules which cannot be repaired outside Apple’s service centres, cracked or torn digitizer flex cables which are integral to the panel and cannot be swapped separately, panel-level defects like uneven backlight or stuck pixels present out of the box, and loose or lost screws that damaged the underlying logic board or battery.
If your repair falls into one of these categories, the shop should fit a fresh panel rather than attempting a fix. A shop that tries to reglue a lifting display without replacing the adhesive, or reattach a damaged Face ID cable without a fresh module, is cutting corners.
If you have a broken phone screen and are still deciding whether to book the repair in the first place, our guide on immediate steps to take with a cracked iPhone screen covers what to do in the first few hours before you can get to a workshop. For pricing context, how iPhone screen repair costs work in Newport explains the model-by-model brackets, and if you are still weighing shops, vetting a reliable iPhone repair service walks through the specific questions to ask.
Booking a Same-Day iPhone Screen Repair (or a Second Opinion) in Newport
iPhone Repair UK is an Apple-only workshop at 39 Commercial Street in Newport, a short walk from Friars Walk, John Frost Square, and Newport train station. Because we only work on Apple hardware, every technician here fits multiple iPhone screens each week and knows the specific tolerances, cable routings, and calibration steps that separate a proper repair from a rushed one. That includes True Tone data transfer, Face ID module handling, fresh adhesive gaskets, and Repair Assistant initialisation on iPhone 15 and later.
Every repair starts with a free diagnostic. If you have had a screen repair done elsewhere and something on the checklist above is failing, bring the phone in and we will inspect it, tell you exactly what the fault is, and quote a fixed price to correct it. If it is a straightforward panel or fitment issue, we can usually complete the rework the same day. Payment is on completion. Nothing is charged until the phone works properly. To learn more about our repair timings, what to expect from a same-day iPhone repair in Newport walks through the typical timeline.
To book a same-day iPhone screen repair or arrange an inspection, call 01633 549755, WhatsApp 07424 623491, or drop into our workshop at 39 Commercial Street, Newport, NP20 1HP. We are open Monday to Saturday 9am to 6pm, and Sunday 11am to 4pm. You can also message us to book a re-inspection of a recent screen repair via our contact form and we will confirm a time before you make the trip.
Frequently Asked Questions
How Can I Check If My iPhone Screen Repair Was Done Properly?
Run the 5-point checklist within the first 24 hours: test touch response across every zone, confirm True Tone and Face ID work, inspect the display for flush seating and even adhesive seal, check brightness uniformity across a plain white screen, and watch for display artifacts and ghost touches.
What Are the Signs of a Bad iPhone Screen Repair?
The most common signs are True Tone missing from Settings, Face ID not working, the display lifting from the frame at one edge, ghost touches with no finger contact, dead or stuck pixels, uneven brightness across the panel, and a green or pink tint on OLED screens.
Can iPhone Screen Repair Go Wrong Days After the Repair?
Yes. Some faults, particularly True Tone reversion, adhesive failure, ghost touches in cold weather, and Face ID intermittent failure, develop days or weeks after the repair. Any reputable shop’s warranty covers these and twelve months is standard.
Should Face ID Work After a Screen Replacement?
Yes. The Face ID module is separate from the display, but its flex cable runs across the display assembly and must be transferred carefully. If Face ID stops working after a screen repair, the module has been damaged. This cannot be repaired outside Apple’s own service infrastructure, but a shop that damages it should still cover the cost consequences under warranty.
Why Is My True Tone Missing After a Screen Replacement?
The True Tone calibration data lives on a small chip within the original display. When the screen is replaced, that data must be transferred to the new panel using a specialised programmer, or the new panel must ship pre-programmed. If the shop skipped this step, True Tone will not appear in Settings. Return to the shop as a competent technician can restore it in about ten minutes.
Is Ghost Touch After Screen Repair Fixable?
Usually, yes. Ghost touch is most commonly caused by a poorly seated digitizer flex cable or a faulty panel. A rework or a fresh panel resolves it. If it persists after rework, the digitizer or panel is defective and should be replaced under warranty.